Sunday, December 30, 2012

Year in Review and a Hopeful Look Forward

When I started this little blog I only intended to share recipes and meals being cooked in my kitchen.  Over the past nine months I have enjoyed discovering other similar blogs and what I have appreciated most is the combination of delicious recipes and personal stories.

I am going to branch out and follow the lead of some of my favorite blogs with a reflection of the past year and list some of my intentions for 2013.

A year ago I was in chronic pain and feeling hopeless.  There were so many blessings in my life (my husband, my daughter, we had recently moved closer to family etc.) but I had been in chronic pain for a year and was paralyzed with fear about what might be wrong with me.

It started as a sharp, stabbing headache at the back of head but quickly developed into a daily headache that wrapped around my entire head and spread across my face.  I woke up with it and fell asleep (or tried to sleep) with it. I woke up every hour or so through the night and continued the cycle the next day. The pain caused me to feel anxious and worried most of the time and I felt unable to enjoy the obvious blessings in my life.

Last January I finally saw an ENT (for months the headache had been diagnosed as "allergies" but allergy treatments had no affect) who referred me to a neurologist.  After a battery of tests she diagnosed me with occipital neuralgia and prescribed me Lyrica.  The good news was that the Lyrica gave me some relief from the headache.  It was finally manageable. I could sleep through the night. The headache decreased from a level 10 to a 2-3.  If I missed a dose it flared up again but for the most part the Lyrica masked the pain.

The bad news was that I could not try to conceive another child while on Lyrica.  This immediately led me to pursue any other possible treatments. Not much is known about occipital neuralgia. My best understanding is that the occipital nerves, which originate at the back of the head and wrap around the front, become aggravated by muscle spasm, swelling, lesions or tumors. Tests had ruled out lesions or tumors so that left spasm and swelling which in my case may be triggered by stress and scoliosis.  I sought help from a wonderful group of practitioners at a wellness clinic which provides chiropractic care along with massage, nutritional counseling and physical therapy.

Through dietary changes (mostly cutting out caffeine and sugar), vitamin supplements (extra vitamin D and B12 complex), chiropractic care, massage therapy and exercise (I now attend Pilate's and spin classes regularly) I have managed to cut back to half of the amount of Lyrica I started on but have not been able to come off entirely.

The other benefits I have received from all these treatments have been AMAZING!! I sleep better, have more energy, feel emotionally better and my posture is greatly improving. All of this also led me to address a lifetime of intestinal troubles.  This meant another round of tests which thankfully all came back negative but gave me no real answers.  With out a specific diagnosis I have cut gluten and dairy from my diet and have never had such a regular digestive system!

At the beginning of this month I tried a series of Botox injections to help the headaches. The theory is that the Botox relaxes (or paralyzes) the muscles around the nerve endings which will reduce the aggravation and hopefully eliminate the headache. Apparently it has been a very successful treatment for migraines.  Unfortunately, it did not work for me and I actually feel like it made the frontal headache worse.

Even though I still have a daily headache, I am feeling very hopeful about 2013. A year ago I was afraid and not very hopeful.  Today I am grateful for my journey with chronic pain, all that it has taught me and the positive changes it has caused me to make in my life.

I have never been one to make New Year's resolutions but several blogging friends have been listing their intentions for 2013 and have inspired me to do so as well.

My Intentions for 2013

  1. To remain dairy, gluten, refined sugar and caffeine free
  2. To attend Pilate's class at least once a week and be able to do a roll-up with out assistance
  3. To attend spin class once a week and increase my resistance and sprint speed 
  4. To incorporate more high-protein vegetarian meals into our routine by trying at least one new recipe a month
  5. To continue to seek alternative treatments for occipital neuralgia and stop taking Lyrica
  6. To blog at least once a week about new (or new to me) recipes and treatment of my chronic pain
  7. To take time each week to read or watch something inspirational (I would love to say once a day... but I want my intentions to be realistic and attainable!)


I am feeling very hopeful as I look forward to 2013! What a difference a year can make.

Do you live with chronic pain? What natural treatments have you found helpful? What do you do to stay positive?

Monday, November 5, 2012

Fun in the kitchen... even when the recipe flops!


So I had grand plans for baking tonight. We were going to make yummy muffins, make a huge mess and have a fun in the kitchen.  We accomplished two out of three goals. We had a blast and made a HUGE mess but the muffins were a complete flop. Even after almost an hour in the oven they were still soupy.  Not quite sure what I did wrong... however I thought I would still share photos of how my daughter helped me every step of the way.


First we needed chopped apples and I am so excited about my new food processor that I decided to use it to chop the apples. (this may be were the recipe went awry because they turned out more like apple puree..) My daughter is fascinated by the food processor.  After making sure it is unplugged I let her put the apples in the bowl (what toddler doesn't love transferring objects from one place to another?) Since the machine isn't too loud she also loves pressing the button and watching everything whirl around!


Then we measured out all the dry ingredients and put them in a bowl. She likes to know about all the ingredients and must touch each of them before dumping them in the bowl!


She tells me that hand mixing is the best technique and the messiest!


Then we dumped in all the wet ingredients. This is the maple syrup going in. Somehow she managed to keep it all in the bowl!


The whisk seems to be the easiest tool for her to use when mixing wet ingredients.  The spoon is still a little too hard to get around and usually ends up flinging batter around instead of mixing.  She of course wanted to use the spoon...

Next time I may let her use a small measuring cup to help me fill the muffin tins.  


These smelled so good but unfortunately they just didn't bake well.  We had a great time making them and left me with a sink full of dishes!

What is your favorite thing to make with your little one?


Sunday, November 4, 2012

Curried Coconut Carrot Sweet Potato Soup


Last week I mentioned I was going to try two new recipes for lunch.  I didn't get around to trying the soup until today... and it was well worth the wait. Can't wait to have it for lunch again tomorrow!!

I was inspired by this delicious and simple ginger carrot soup but I didn't have ginger or a shallot so I had to improvise. I did have a package of frozen sweet potato I wanted to use and so here is what I came up with...

Ingredients
1 bunch carrots (I had about 8-10 medium carrots)
1 bag frozen sweet potato (or maybe 1 large diced sweet potato)
4 teaspoons sesame oil
2 cups broth (chicken or vegetable)
1 to 1 1/2 teaspoons curry powder
1/2 cup Coconut Creamer (unsweetened)
Salt and pepper to taste

First dice the carrots and sauté in the sesame oil in a large pot. When the carrots begin to soften (about 5-10 minutes) add the frozen sweet potato and sauté for another 5 minutes. 


Once all is warmed through and softened add two cups of broth and the curry powder.  Simmer for 15-20 minutes.  Then add coconut creamer and simmer for another 5-10 minutes.  Finally transfer mixture to a food processor (you may need to do this in several batches) and pulse until you have a rich, thick creamy soup! Serve warm and season with salt and pepper. Mine came out quite thick but I like soup that way. You could always add more broth to make it thinner.

What's your favorite soup to make with a food processor??


Sunday, October 28, 2012

Toddler in the Kitchen!!  (and this week's dinner plan)

My daughter has been spending A LOT of time in the kitchen wanting to "help" mommy.  As soon as I start rummaging around in the kitchen she flashes a big grin, grabs her little blue chair and excitedly rushes into the kitchen.  It is very hard to say no... even if there really isn't anything for her to do. So I have started to get creative about coming up with tasks for her.  They may add a few minutes to the prep time for a meal but these are precious moments we get to spend together and I hope the beginning of a life-time joy of cooking for my daughter.


She loves to watch me chop things.  She takes the rules with kitchen tools very seriously.  Knives are grown up tools and she is very good at keeping her distance from the board.  When I've finished she loves to put the pieces in the pot or if I'm putting them in a hot pan I have her put them in a small bowl and then I transfer them. "Here you go Mommy... I helped!"

She also loves to pour water.  Even though it is easier to put water directly from the tap into the pot I will use a measuring cup and have her pour the water in. The best part is if a little spills. "Whoopsie Daisy Mommy! We need to clean up!"

I've also been trying to do more recipes that she can help with.  Lately one of our favorite things to make are the cookie dough balls from our friend Laura a mommy run fast.  We really like the chocolate coconut ones. This week we will be making halloween treats for her friends at school. I will be sure to post pictures of that!


This is the last week of the October menu planning challenge.  While I have had a hard time finding the motivation on Sunday's to plan (maybe I should plan on another day!) I have appreciated seeing all the other plans and enjoyed pushing myself to try new recipes each week.   This week I am giving myself an additional challenge. I am going to try to make two new recipes for lunches. I have a hard time taking time to eat a good lunch so this week I will try to make this delicious spaghetti squash and jalepeno casserole (with non-dairy substitutes) and with my new food processor I will try this ginger carrot soup! I will try to post updates about these recipes.


Here is this week's dinner plan. 

Tuesday: Left overs
Wednesday: Dinner at a Halloween Party!
Thursday: Pork chops with rolls and green beans
Saturday: Left overs
Sunday: Pork roast

Thank you to Laura and Jill for this great month long challenge! It has introduced me to many new blogs and helped me discover some new delicious recipes!


Monday, October 22, 2012

Menu Planning Week 4 - Searching for Inspiration

Before I get to this week's meal plan I have to say that last week's birthday celebration was epic! My daughter and I had a blast baking a green cake for daddy's birthday. I promised photos so here they are. You can't really tell but the inside of the cake was green too!


Then my husband and I got to go away for a night. We went to the movies, slept in, went shopping... it was a blast and much needed! We came home to a very happy girl who had a great time with her Nanny (my mother-in-law) and then we were off to a cousin's first birthday party! I ended up not cooking all weekend and actually loved the break.

When I sat down to menu plan yesterday I felt like I had "menu-planning" block. Even after looking at all the amazing link ups I still couldn't think of a single thing I wanted to make! Does this ever happen to you??

After spending too much time searching the Internet and looking through recipe books I came up with a plan and did the grocery shopping for the week.  Of course today I woke up full of inspiration so next week's plan will be easier!!

link up here


Mondaycreamy penne pasta bake with zucchini

Tuesday - leftovers (or pork chops)

Wednesday - Pasta Bolognese (double batch so I can take a meal to a friend)

Thursday - pork chops

Friday - Slow Cooker Chicken Tikka Masala (with non-dairy substitutes)

Saturday - leftovers

Sunday - Pork Roast

That is the plan.  Several new recipes I am excited to try out.

Also, I received a food processor for my birthday. I am so excited but can't decide what to make first!! 

What is your favorite thing to make with a food processor??

Sunday, October 14, 2012

Meal Planning Challenge Week 3 - Birthday Week!
Link Up!!
My husband's birthday is two days before mine which always makes for a fun week of celebrations. We usually celebrate on the 19th which we call the "inter-birthday". This year we get to have a special night away thanks to my Mother-in-law.  I am looking forward to dinner, a movie (haven't seen one in the theatre in three years) and SLEEPING IN!!

This year we will also do a little celebrating on Thursday because my daughter has to make daddy a cake. We can no longer have a birthday in this household without having cake and candles.  I will be sure to post pictures of her cake making adventures but be forewarned... it will not be healthy :) 

Here is this week's dinner plan:

Tonight: Dinner with family

Monday: Chicken, garlic, basil pasta with broccolini (We are in a rut of doing this every Monday, but my daughter loves it and she takes it to school for lunch the next day)

Tuesday: Leftovers (either from Monday night or I have extra Santa Fe Chicken that I froze)

Wednesday: Pork chops, rolls and green beans

Thursday (Daddy's Birthday): Carne Asada (I splurged and picked up a delicious marinated flank steak from the grocery store), rice, beans and tortillas

Friday: DATE NIGHT!!!!

Saturday: Dinner at a birthday party 

Sunday: Spaghetti bolognese and salad

While I still have to motivate myself to meal plan (thanks to Laura and Jill for this challenge!) I do find that it makes shopping much easier and the week goes smoothly when I don't have to worry if I have everything I need to make dinner.  


Wednesday, October 10, 2012

Carne Asada... That is what's for dinner!


I chose one new recipe for this week's menu planning challenge. I used a recipe for Carne Asada from www.eatingwell.com.  I followed their directions for preparing the beef and marinated it over night.


It was really easy to prepare this meal. I decided to buy some pico-de-gallo from the store rather than make the salsa listed in the recipe.  We got home from the park, I heated up the broiler pan and started making rice.  Once the pan was hot I placed the meat in the oven and started to heat up the beans. 

 I am notorious for overcooking meat and did it again last night!! I followed the recipe and cooked it for 4 minutes on each side. When I checked the meat it looked almost raw in the middle, so I did another 3 minutes. Then it looked a little better but I still cooked it for 3 more minutes.  I probably did not need that last 3 minutes. I know that the meat continues to cook after you take it out of the oven and leave it sitting but I just never trust it. Next time I might try 5 minutes per side and not give into the temptation to cook it more.

Served with rice, beans, pico, avocado and fresh tortillas it made for a delicious dinner.  The meat was tender but not as flavorful as I would have liked. Maybe next time I will up the spices in the marinade.

What is you favorite quick and easy Carne Asada recipe?


Sunday, October 7, 2012

Menu Planning Challenge - Week Two!
sign up here
Last week's menu plan went very well. I tried two new recipes.  The herb crusted pork chops were so-so but the Crock Pot Santa Fe Chicken was a huge success!!


My daughter loved helping putting the ingredients in the crock pot (even Elmo helped) and my husband was excited to eat leftovers for lunch the next day. I followed the recipe from Gina at www.skinnytaste.com.  I substituted two cups of water for the chicken broth and it was a little watery so this week I will cut back on the liquid.


Here is this week's plan. I was feeling a little less inspired this afternoon so I only plan on trying one new recipe this week.

Monday: Basil, garlic and chicken pasta with salad

Tuesday: Carne asada tacos with rice and beans (New recipe!)

Wednesday: Spaghetti bolognese with green beans

Thursday: Leftovers

Friday: Crock pot Santa Fe chicken with rice and beans

Saturday: dinner out??

I can't finish this entry with out mentioning the amazing, delicious sweet treat I made this week.  My friend Laura at www.mommyrunfast.com has some amazing no-bake snack ball recipes. I combined her no bake peanut butter balls and coconut brownie bites recipes to make a delicious chocolate, coconut oat ball. I used almond butter instead of peanut butter and used maple syrup instead of honey.  They are SO delicious. I gave up refined sugar NINE months ago and this is the first refined sugar free treat I have made that actually satisfies my sweet tooth!!


Thursday, October 4, 2012

Basil and garlic pasta with chicken and a side of broccolini

Lately my two year old has been spending a lot of time with me in kitchen. She likes to pull up her little blue chair and "help" me make dinner.  Sometimes I have to get creative about tasks I give her but she really loves it.  However, this meal requires hot oil in multiple pans so I really prefer her to be out of the kitchen.  Tonight she happily watched a 30 minutes TV show while I cooked dinner!

This meal can be a little bit of a juggling act, but it really can all be prepared and cooked in thirty minutes.

Here is what you need:

Chicken breast (I buy one boneless breast at the meat counter and ask them to dice it for me)
Pasta of your choice
3-5 gloves of garlic
Bunch of basil
Olive oil
Bunch of broccolini (just discovered this in the store... and prepared it using Rachel Ray's recipe)
Garlic salt and pepper
Optional: Other seasoning for your chicken such as cumin and other add ins such as zucchini, tomatoes etc.

First put the pot on for the pasta and place 1/4 cup olive oil in a large skillet on med-high.

Place the chicken in the large frying pan and season with garlic salt, pepper and anything else you would like! (this week I added cumin which was delicious) Cook about 5-7 minutes.  I like to have small pieces of chicken so I often use a metal spatula to cut the pieces after they have been in the pan for a few minutes. I will do anything to avoid cutting raw chicken on a cutting board!


While the chicken cooks quickly wash the broccolini and cut just the ends off. The stalks should be between 3-5 inches long. Place in a small/medium frying pan, cover with water, bring to a boil, cover with a lid and let simmer for 6-8 minutes until it is bright green and tender.


When the chicken is cooked all the way through remove from the pan (leaving the oil in the pan) and set aside.  Turn the heat way down under the oil and let it cool while you mince the garlic. It usually works best to mince it finely with a knife, but if you are in a hurry (like I was tonight... the TV show wasn't keeping my daughter's attention!) you can use a garlic press.

When the oil has cooled down put 3/4 of the minced garlic in the large pan. (The rest of the garlic is for the broccolini.) Rinse basil and cut the leaves into small pieces.  Add to the large pan and simmer with the garlic for a few minutes.

When the broccolini is bright green and tender drain and set aside. In the same small pan add a small amount of olive oil and return to med-low heat. When the oil is warm add the rest of the garlic. Let the garlic simmer until it begins to brown and then return the broccolini to the pan. Turn the broccolini over and over to coat with the oil/garlic mix and then let cook for a few more minutes. When it is tender and covered with yummy garlic and olive oil it is finished!

Hopefully the pasta is done cooking by now. Drain and place in a large bowl.  Mix in the chicken and olive oil/garlic/basil mixture.


Its a juggling act but my family does enjoy this delicious meal.  My daughter also likes having the leftovers in her lunch.

What's your favorite quick pasta dinner?


Sunday, September 30, 2012


Menu Planning Challenge accepted!

It is time to give some long overdue attention to my little blog.  I have been cooking up a storm in my kitchen but not taking the time to document any of it.  I am sure many others in the blogging world can relate!

My friend Laura at mommyrunfast.com has teamed up with her friend Jill to organize a menu planning challenge for the month of October.  This inspired me to re-commit to my blog and try to change up my weekly meals.  I am going to try two new recipes this week!

Link Up Here

Here is my plan for the week. I hope I can stick to it!

Sunday: Dinner at a friend's house

Monday: Chicken, basil pasta with a side of garlic broccolini

Tuesday: Herb-crusted pork chops (new recipe!), rice and peas

Wednesday: Spaghetti bolognese with green beans

Thursday: Leftovers

Friday: Santa Fe crockpot chicken (new recipe!)

Saturday: Roast pork tenderloin, roast potatoes and green beans


While this is a blog about cooking for my family, I would like to add that we joined our local YMCA this week.  I have spent the last nine months trying to prepare more health-conscious meals so it only makes sense that the next step would be to try and be healthier outside of the kitchen!  I really love the feeling of community at the Y and appreciate that our daughter can also be included on our quest to become healthier.


Wednesday, May 2, 2012

Chocolate Chip Cookies - Gluten Free and almost Dairy Free/Sugar Free

These simple chocolate chip cookies are mommy's little treat.  My husband and daughter won't touch them, but that just means there are more for me! The only sugar and dairy in this recipe are in the chocolate chips. You can use dairy free/sugar free chocolate chips, to make them completely free but I didn't have that kind in my cupboard tonight.

These aren't gooey, chewy chocolate chips cookies.  They are more like shortbread cookies with chocolate chips. But after three attempts at tweaking recipes this is the most moist batch I have made.

Tonight I made these after my daughter went to bed. It took about 40 minutes from start to warm cookies out of the oven.

Ingredients:
2 cups Bob's Red Mill All Purpose Gluten Free Flour
1/2 teaspoon Xanthan Gum
1 teaspoon stevia powder
3/4 teaspoon baking powder
1 cup (16 tbsps) softened butter substitute (I used Shedd's Willow Run Soy-Bean Margarine)
2 eggs
1 cup chocolate chips

Heat the oven to 350 degrees.

First sift the flour, xanthan gum, and baking powder into a small/medium bowl. Set aside.


(If you don't have a sieve like this one you can also use a strainer and a spoon to achieve the same result.)

Next, in a medium/large sized bowl mix the butter substitute, eggs and stevia with a mixer.

Because I use butter substitute the batter doesn't become completely smooth but remains slightly lumpy.
Click here for a great list of butter substitutes.


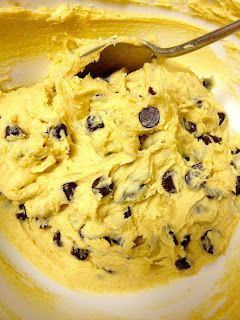
Next add large spoonfuls of the flour mixture into the bowl while continuing to mix with the mixer. The batter will become quite thick and dough like.  Once thoroughly mixed, use a large spoon to stir in the chocolate chips.


Use a teaspoon to spoon the dough onto greased or lined cookie sheets. You will want to flatten to dough out because these cookies don't spread much while baking. You can also put them quite close together since they won't spread like a traditional cookie.


Bake for 15-20 minutes depending on the heat of your oven.  I baked mine for 10 minutes, checked them and then baked for an additional 5 minutes.  They won't change color or shape much so it can be hard to tell when they are done but I press gently on the top to check to see if they are cooked through.

These aren't the most beautiful cookies however they certainly satisfy my need for a sweet treat! They are best when warm.

I am pretty new to the world of gluten-free/sugar-free/dairy-free baking.  If you have a yummy recipe you would like to share please leave me a comment... I would love to try some new things!

Thursday, April 26, 2012

Oatmeal Spice Cookies - Gluten Free, Dairy Free and Refined Sugar Free

My daughter has been asking every day to cook something, so this afternoon I decided to try an oatmeal cookie recipe. I have been looking for gluten-free, dairy-free, sugar-free recipes that are simple  and delicious. I think I may have finally found one!!

I adapted this recipe from the soft oatmeal raisin cookie recipe posted on Mom's Healthy Eats.

First we gathered all the ingredients:

Dry Ingredients:
1 Cup Bob's Red Mill All Purpose Gluten Free Flour
1/4 teaspoon xanthan gum
1 Cup Bob's Gluten Free Oats
1/2 teaspoon salt (next time I might use 1/4)
1 teaspoon baking powder
1 teaspoon cinnamon
1/8 teaspoon ground ginger
1/8 teaspoon ground nutmeg
3/4 cup granulated organic coconut palm sugar

Wet Ingredients
1/2 cup coconut oil
1 teaspoon vanilla extract
1 large egg


Next, combine all the dry ingredients, except for the palm sugar, in a large bowl. Use a whisk or a spoon to mix well. 


Then melt the coconut oil in a small pan over very low heat. I like to melt it about half-way, remove from the heat and then stir until completely melted. This keeps it from getting too hot. Then stir in one large egg and 3/4 cup palm sugar.  I did all this while my daughter happily played with the dry mix and made a wonderful mess on our table.


Next, mix the wet ingredients with the dry ingredients. We made the mistake of starting with the whisk, but the batter was way to thick for a whisk so we switched to the wooden spoon. The only other tricky part was keeping my daughter's hands out of the mix since it now contained raw egg.


When mixed thoroughly it looks a bit like bread dough.


Spoon heaping tablespoons onto lightly greased cookie sheets. Bake in the oven at 325-350 for 6-10 minutes. I am learning that temperatures and time really vary from oven to oven. I baked these at 350 for 7 minutes and they were a little too crispy on the bottom so next time I will try 325.

At first my daughter was not at all sure about these...


But then she took a big bite and the cookie was gone within minutes!


I liked this recipe because it was simple and didn't have a million ingredients.  Next time I might cut the salt in half and add a little stevia to sweeten them.

Do you have a favorite sugar-free, healthy treat?  If so, please leave me a comment and share your recipes!

Monday, April 23, 2012

Pork Roast - Sunday Dinner With the Boler Family

My side of the family is British and as long as I can remember my mom has cooked the best roasts I have ever tasted.  She perfectly cooks the meat, potatoes, vegetables and gravy. I think she may have a secret ingredient because mine never quite taste like hers, but they are always a hit in our house.  We have started a tradition of cooking a roast on Sundays and inviting people over for dinner.  There is always more than enough food and it is wonderful to come together with family and friends over a hot, home-cooked meal.

Here is what you need for a Pork Roast dinner:

One pork tenderloin
A vegetable (I usually do green beans)
Potatoes (1-2 per person depending the size of the potato)
Olive Oil
Salt
Garlic Salt
Pepper
Majarom (optional)
Bisto Gravy Powder  (The powder not the granules)

This meal usually takes me about an hour and a half from start to finish.  Once the roast is in the oven you will be free to do other things while it cooks.

First, turn the oven on to 350 degree.  Next, peel the potatoes. (This is my least favorite part!) Then cut them into fourths if they are small and eighths if they are medium/large potatoes.


Put them in a large pot, cover them with water, add a dash of salt and bring to a boil. Let boil for 5-10 minutes until the edges begin to soften.  Then drain, put in a large bowl and toss with enough olive oil to coat the potatoes.


Next place the pork tenderloin in the center of a baking pan. Rub with olive oil and season with salt, pepper and marjoram.  Then place the potatoes around the pork and spring garlic salt over everything.  You can also add a little more olive oil if you would like.


Cook for 20-25 minutes. Then remove pan from the oven and baste the pork and potatoes with the oil. I do this by tilting the pan to allow the oil to run into a corner and then using a large spoon to spoon the oil back over the top of the meat and potatoes.

You will want to cook for another 20-30 minutes depending on how big the piece of meat is. If you want your potatoes to be extra crispy you can turn up the heat a little.

I am not great at getting everything ready at the same time but I get it pretty close.  After I have basted the roast I get the beans ready and put them on to boil. Usually by the time they are done the meat is done as well.

Before you pull the meat out you will want to prepare the Bisto powder. You can follow the directions on the package or use my method. I take one cup of cold water and mix in a heaping serving spoon of Bisto powder.


Next pull the meat out.  (Check to make sure the pork is cooked all the way through.) Spoon the potatoes into a serving bowl and cover with tinfoil to keep warm. Then remove the meat and put it on a cutting board or plate to be sliced.


Remove any large leftover chunks of potato or fat but leave most of the drippings. Place the pan on a burner set on low and slowly mix in the bisto powder and water mix.  (If you haven't already drained the beans do so now and add a little of the water to the gravy pan.)

It is very important to stir well and frequently so it doesn't get clumpy.  At this point I begin the dance of stirring gravy, cutting meat, and getting everyone ready for dinner.


After a few minutes the gravy should thicken. If it doesn't then you can add a little more Bisto. (Be sure it mix it with a little water before adding it to the pan so you don't get clumps.) It shouldn't be as thick and an American white gravy but it will thicken enough so that is pours slowly off the spoon.

Pour the gravy out the pan and into a gravy boat or a measuring cup if you don't have one.  Put everything on the table, remove the tinfoil and dinner is ready!


I love the simplicity and deliciousness of this meal.  Do you have a favorite traditional family meal? If so, leave me a comment and let me know about it!

Wednesday, April 18, 2012

Yummy Granola - Enlisting the help of a toddler

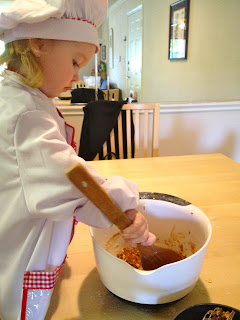
Today I decided to make something with my daughter.  She loves to cook, stirs better then anyone I know... and she even has a chef outfit.


Cooking with little kids can be overwhelming but it is such a blast. Be ready for some extra-work, a mess and lots of giggles.

First the recipe. It is really simple:

Ingredients:
4 cups rolled oats (I used Gluten-Free Oats)
1/2 cup raw pumpkin seeds
1/2 cup chopped almonds
1/4 cup sunflower seeds
1-2 tbsp coconut flake
1-2 tbsp milled flax seed
1/2 cup coconut oil
1/3 cup honey
1/3 cup almond butter (or any type of nut butter)
(You could add, take away or make substitutions)

Directions:
Heat oven to 250 degrees. Mix all dry ingredients.  Mix in coconut oil (heated to a liquid).  Mix in honey.  Mix in almond butter.  Place in a greased baking pan.  Cook for 30-40 minutes.  BE SURE to stir every 10 minutes until granola is golden brown and the most of the granola is no longer sticking to the bottom of the pan (the gooey honey is gone).

Here is how I made it today.

Before cooking with my daughter I make sure I have all my ingredients and tools out and ready on the dining table.


I let her help me dump all the dry ingredients in a big bowl and then let her loose with the spoon. She has many mixing styles...

The traditional stir:

Using her hands to put the ingredients on the spoon before stirring:


And using the measuring cups:


Once it is mixed you should always smell it:


And of course lick some of the spoons!


Luckily this time most of the granola stayed in the bowl! 40 minutes later it was done and my house was put back in order... until she decided to pull everything off her toy shelf and proudly exclaim "I made a mess!"